www.GilesDarling.me.uk

School Quiz Push Buttons and Program

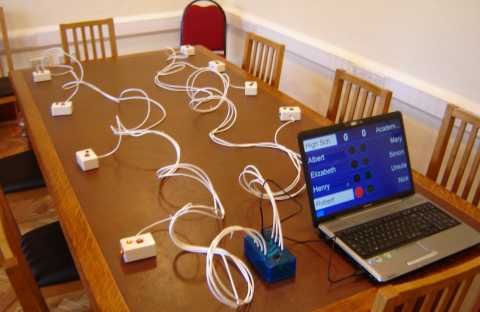
I recently made a set of eight push buttons for a school quiz contest - two teams, each with four contestants

Like the TV programmes University Challenge (in the UK) or College Bowl (in the USA), the first contestant to press their button disables all the other contestants' buttons until the reset button is pressed

School Quiz Push Buttons

Teensy USB-powered Microcontroller

I used a Teensy 2.0 USB-powered microcontroller from PJRC.com to handle all the inputs (buttons) and outputs (LEDs) and because it connects to a computer, I wrote a computer program to respond with bells, whistles etc. to the key presses generated by the Teensy

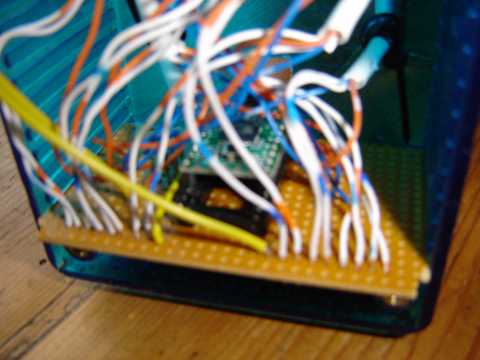
This blurry photo shows the Teensy plugged in to an IC socket mounted on stripboard/circuit board. I was originally going to solder the Teensy (which I ordered with header pins) directly to the stripboard, but I decided to use an IC socket instead as I'm not too steady with the soldering iron

Then I soldered the connecting wires to the push-to-make buttons and the LEDs (the nearest row of wires is the GND connections to each button and LED)


I adapted example code from the PJRC.COM website to upload the following code onto the Teensy 2.0:

#include <avr/io.h>
#include <avr/pgmspace.h>
#include <util/delay.h>
#include "usb_keyboard.h"

#define CPU_PRESCALE(n) (CLKPR = 0x80, CLKPR = (n))

uint8_t usb_keys[8]= {KEY_1, KEY_5, KEY_2, KEY_6, KEY_3, KEY_7, KEY_4, KEY_8};
uint8_t led_ports[8] = {(1<<0), (1<<1), (1<<4), (1<< 5), (1<<0), (1<<1), (1<<2), (1<<3)};

int main(void) {
  // f = flag: f = 1 means waiting for reset, f = 0 means waiting for contestant to press button
  // b = port B input (bits 0 to 8 alternates between teams)
  // m = mask (to access each bit in b)
  // i = counter (to count through each bit in b)
  uint8_t f, b, m, i;

  // set for 16 MHz clock
  CPU_PRESCALE(0);

  // Configure all port B and port C pins as inputs with pullup resistors
  DDRB = 0x00;
  DDRC = 0x00;
  PORTB = 0xFF;
  PORTC = 0xFF;

  // Configure all port D and port F as outputs (all OFF except LED on Teensy 2.0)
  DDRD = 0xFF;
  DDRF = 0xFF;
  PORTD = (1<<6);
  PORTF = 0;

  // Initialize the USB, and then wait for the host to set configuration.
  // If the Teensy is powered without a PC connected to the USB port,
  // this will wait forever.
  usb_init();
  while (!usb_configured()) /* wait */ ;

  // Wait an extra second for the PC's operating system to load drivers
  // and do whatever it does to actually be ready for input
  _delay_ms(1000);

  // flag f = 0 means waiting for contestant to press button
  f = 0;
  while (1) {
    // waiting for reset button
    if (f == 1) {
      // reset button has been pressed, so reset flag, send "R" to keyboard input
      if ((PINC & (1<<7)) == 0) {
        f = 0;
        usb_keyboard_press(KEY_R, KEY_SHIFT);
        // turn off all LEDs except LED on Teensy 2.0
        PORTD = (1<<6);
        PORTF = 0;
      }
    }
    // waiting for contestant to press button
    else {
      // get input of all buttons
      b = PINB;
      m = 1;

      // go through each bit of b to read individual buttons
      for (i = 0; i < 8; i++) {
        // button has been pressed, so set flag, send number to keyboard input
        if (((b & m) == 0) && f == 0) {
          f = 1;
          usb_keyboard_press(usb_keys[i], 0);
          // turn on LED on port F for first four buttons (and switch off LED on Teensy 2.0)
          if (i < 4) {
            PORTF = led_ports[i];
            PORTD = 0;
          }
          // turn on LED on port D for second four buttons (and switch off LED on Teensy 2.0)
          else {
            PORTD = led_ports[i];
          }
          // have to split LED output as neither ports F or D have all 8 bits available
        }
        // increase mask to look at next bit
        m = m << 1;
      }
    }
    // wait a short delay so we're not highly sensitive to mechanical "bounce".
    _delay_ms(2);
  }
}


I used Ports B and C as inputs (Port B for the 8 contestants, and Port C for the reset button) and Ports D and F as outputs (for the LEDs - because not all eight bits of these ports are available, I split the outputs between both ports)

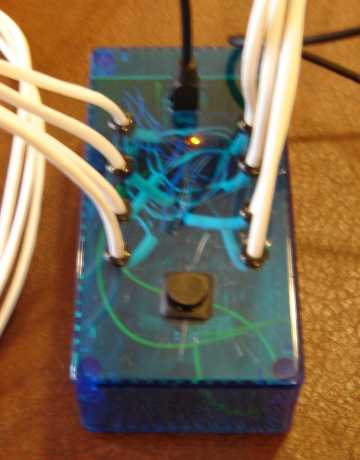
The LED mounted on the Teensy 2.0 is lit when waiting for a contestant to press their button (as in this photograph), and not lit when waiting for the reset button to be pressed

The Teensy and stripboard were placed in a small blue box (transparent so the LED on the Teensy was still visible) which was connected via USB cable to a computer, and white cables to each contestant's button. The box also included a reset button (the black button in this photo)

The computer provides power to the Teensy, and receives keyboard messages sent by the Teensy

(The output voltage for Ports D and F was 4.5 volts, and the maximum operating voltage for my LEDs was 2.5 volts each. So I put two LEDs in series on each output, and therefore didn't need to include any resistors)

School Quiz Small Blue Box

School Quiz Computer Program

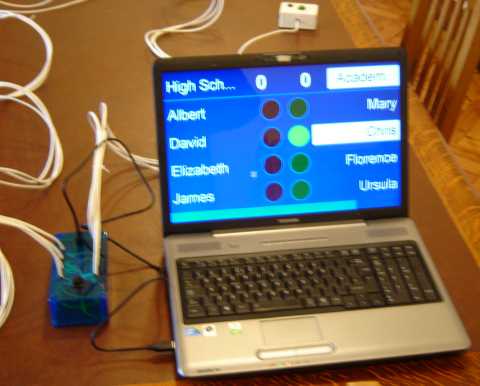
Finally, I wrote a computer program to respond to the keyboard messages sent by the Teensy (1 to 8 for each contestant and R for reset) - although you can use any program (e.g. Notepad) to respond to the key presses

This program shows a suitable quiz display on the computer screen (or up to six monitors) and plays bells, buzzers, whistle sounds (or custom recorded sounds) depending on which team's contestant pressed a button first

The program also shows the current score for each team, and a bar across the bottom of the computer screen shows how long until the quiz is over/time is up (when a gong sound plays)

You can download the program SchoolQuiz.exe here (872 kilobytes)

The program was written using MS Visual Studio 2005 and works OK on Windows XP and Vista. It's a single stand-alone EXE file which you can store where you prefer (e.g. in your Users folder). To uninstall it, simply delete the EXE file. The program doesn't alter the computer's Registry.

I scanned the program for viruses (it came up clear) before putting it on my website. But I would strongly advise you to scan it using your computer's anti-virus software before you run the program

The program is still at the beta-test stage. So if you find any errors, please contact me via the link at the bottom of this page. Because the program is freeware I do not offer any other support, and no help manual is available

Since writing the program, I've been asked to create a version without scores. Click here to download the program SchoolQuiz_NoScores.exe which no longer includes scoring


Contact Me    Home Page This page was last updated on 27th January 2013